2018/11/26
Unity HubでインストールしたUnityのVuforiaプラグインをアップデートする方法

Unity Hubはとても便利で新しい機能ですが、Vuforiaをアップデートする場合、少し面倒な手順が必要になります。
最新のUnityのバージョンを既にインストールしていて、そのUnityと共にインストールされたVuforiaのバージョンよりも更に最新のVuforiaがリリースされている場合、下記の手順でVuforiaをアップデートできます。
Unityを起動するときにVuforiaは無効の状態になっています。(Image1)。
とりあえず、Vuforiaを使用するため、
File>Build Settings>Player Settigsボタン
または
Edit>Project Settings>PlayerからPlayer Settingsを開き、
(Image2)
Player settingsのVuforia Augmented Realityオプションをチェックする必要があります。
(Image3)
Vuforia Configurration Pannelの出し方
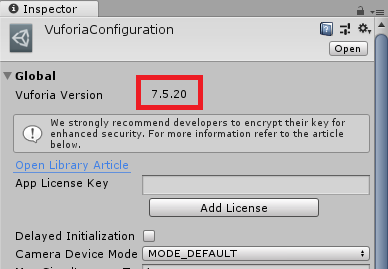
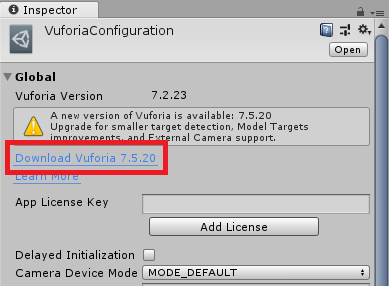
すると Vuforia Configuration Panel でVuforia Update のリンクをクリックできるようになります。(Image4)。
Image1
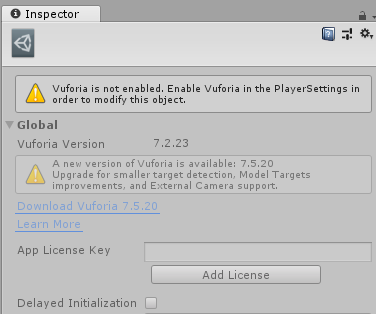
Image2
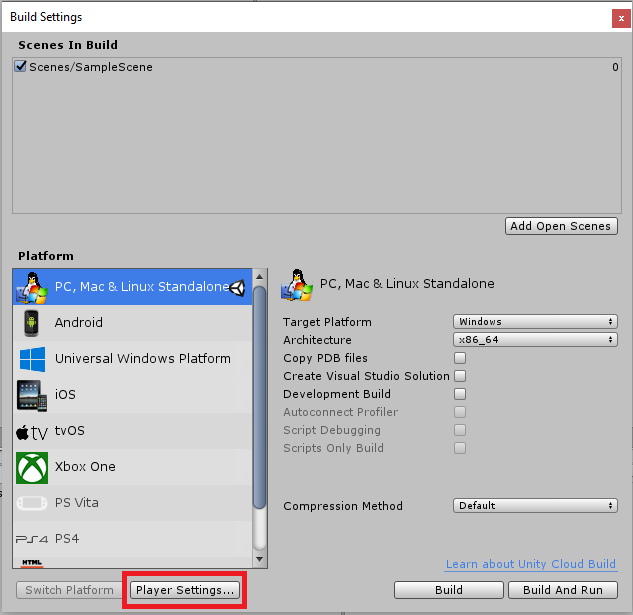
Image3
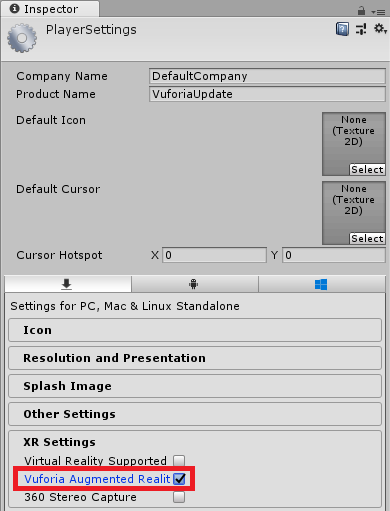
Image4
ここで一旦Unityを閉じてください。
ダウンロードが終わったら、
VuforiaSupportInstaller-Windowsの圧縮ファイルを解凍し、UnitySetup-Vuforia-AR-Support-for-Editorのイントラーをダブルクリックします。
UnitySetupアイコンを選択してください(Image5)。
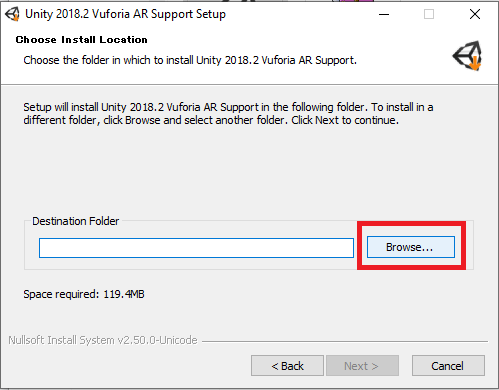
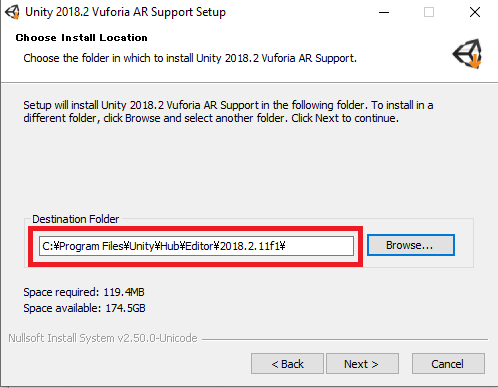
インストールを続いて、Destination Folderのページを見えたらBrowseボタンをクリックしてください(Image6)。
ここで、Vuforiaの最新を適用したいUnityのバージョンの実行ファイルが置かれているパスを指定します。
Image5
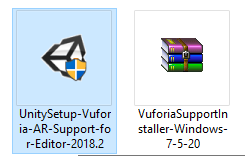
Image6
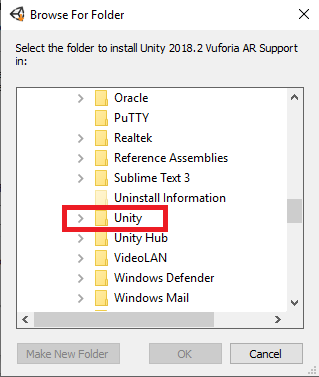
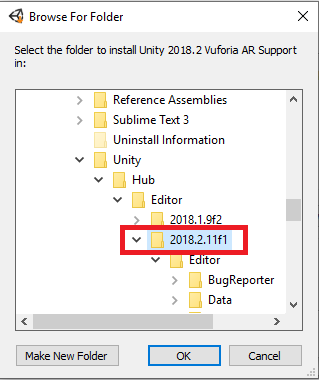
Program FilesフォルダーにあるUnityフォルダーを選択してください(Image7)。(注意:Unity Hubのフォルダーではありません。Unity自体の実行ファイルがあるフォルダを指定する必要があります。)
Image7
それでUnityをアップデートするバージョンを選択し、OKボタンを選択してください(Image8)。
Image8
次のウインドで選んだフォルダーを確認できます(Image9)。それでインストールを最後まで続けてください。
Image9
Unityを起動するとVuforiaがアップデートされていることが確認できます(Image10)。
Image10